
Now that you’re actually ready to stream on your twitch account, the next step is to optimise your OBS settings.
In this article, we will set up OBS’s:
To optimise your OBS settings, open OBS and and navigate to your “Settings” which can be found in the bottom right corner.
Output Settings
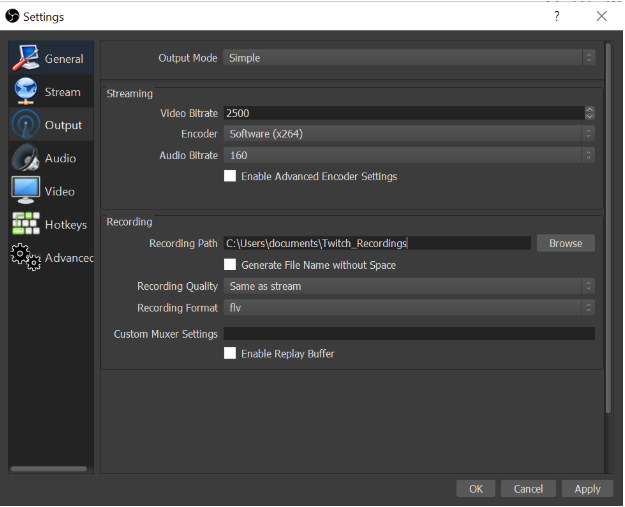
| Setting Name | Value |
| Video Bitrate | Start at 2500 – lower if lag is experienced. |
| Recording | Select where you’d like to save your recordings |
Audio Settings
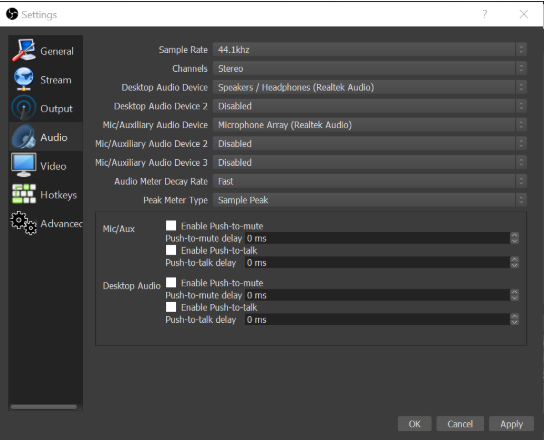
| Setting Name | Value |
| Desktop Audio Device | Select where you would like to hear your audio – your viewers will hear the same as you. |
| Mic/Auxiliary Audio Device | Select your microphone from the dropdown. |
Video Settings
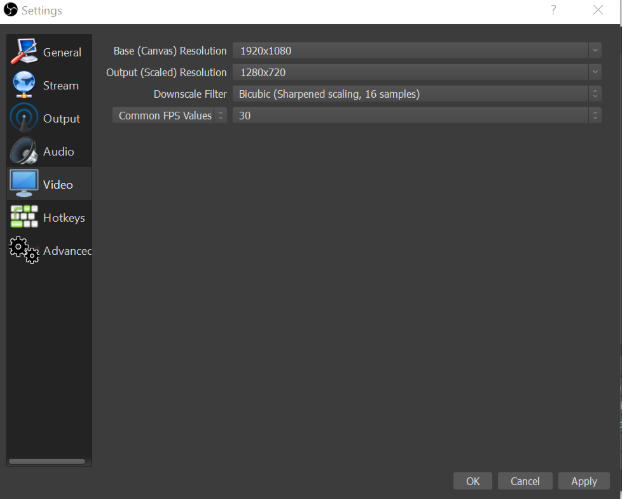
| Setting Name | Value |
| Base (Canvas) Resolution | Set this to your monitor’s current screen resolution |
| Output (Scaled) Resolution | 1280×720 |
Advanced Settings
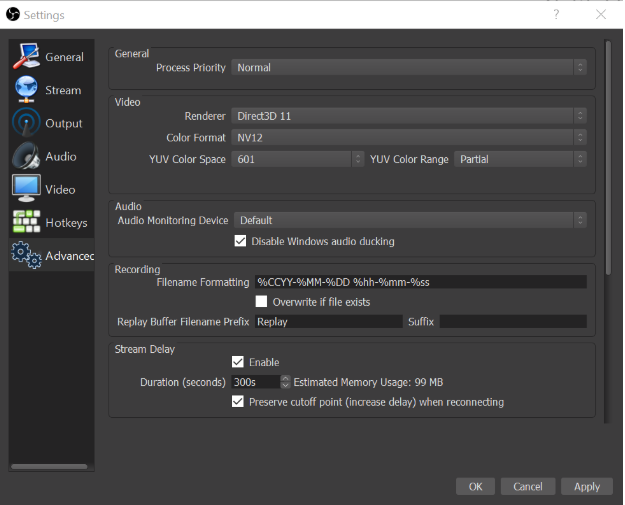
| Setting Name | Value |
| Stream Delay | Enabled |
| Delay Duration | 4 or 5 minute (240-300 seconds) |
StreamR tutorials:
#1: Setting up your streaming software
#2: Configuring OBS Settings (you are here)
#3: Creating your stream layout
#4: Adding custom text to your layout