
The last step before going live is adding text to the overlay. We want to add your Twitch username on the screen as well as adding your social handles.
Installing the required font
The font we use is “Open Sans.” Unfortunately, this isn’t a featured font in OBS. Click here, open and extract the Open_Sans file. Then highlight all the files, except “LICENSE,” right click and select “Install.”
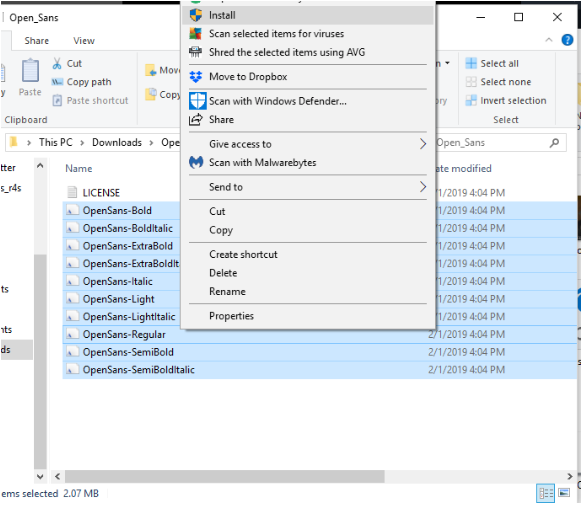
You will need to restart OBS in order to use the newly downloaded font.
After, relaunching OBS add a new “Text (GDI+)” scene.
Adding your Twitch username
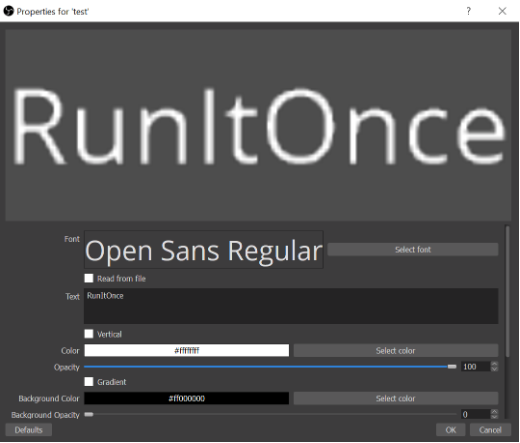
Select font and find “Open Sans” and select “36” as the font size. Now in the “Text” section type your Twitch username.
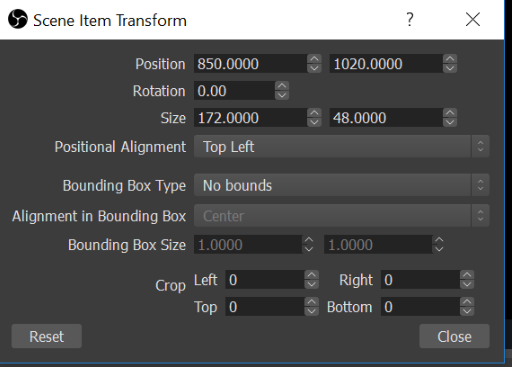
After adding this, right click and select “Transform” and “Edit Transform”
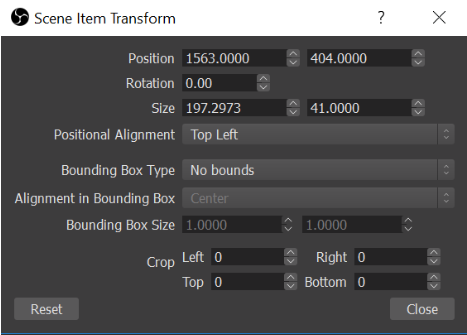
To center your Twitch Username at the bottom of your stream insert the following numbers for “Position.”
Adding text for your social handles
Follow these same steps for adding your:
- Name
- YouTube Channel
- Instagram.
Placing the new text boxes
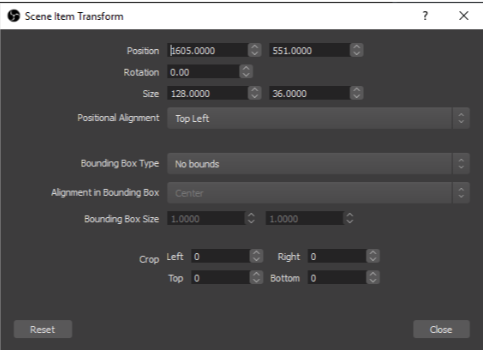
After adding text for each element, you will need to use the “Transform” tool again to properly place the text. Right-click and select “Transform” and “Edit Transform” and insert the following “Positions” for each text element.
Your name
Your YouTube channel

Your Twitter username
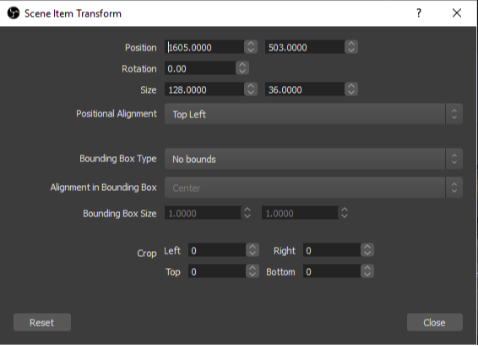
Your Instagram username
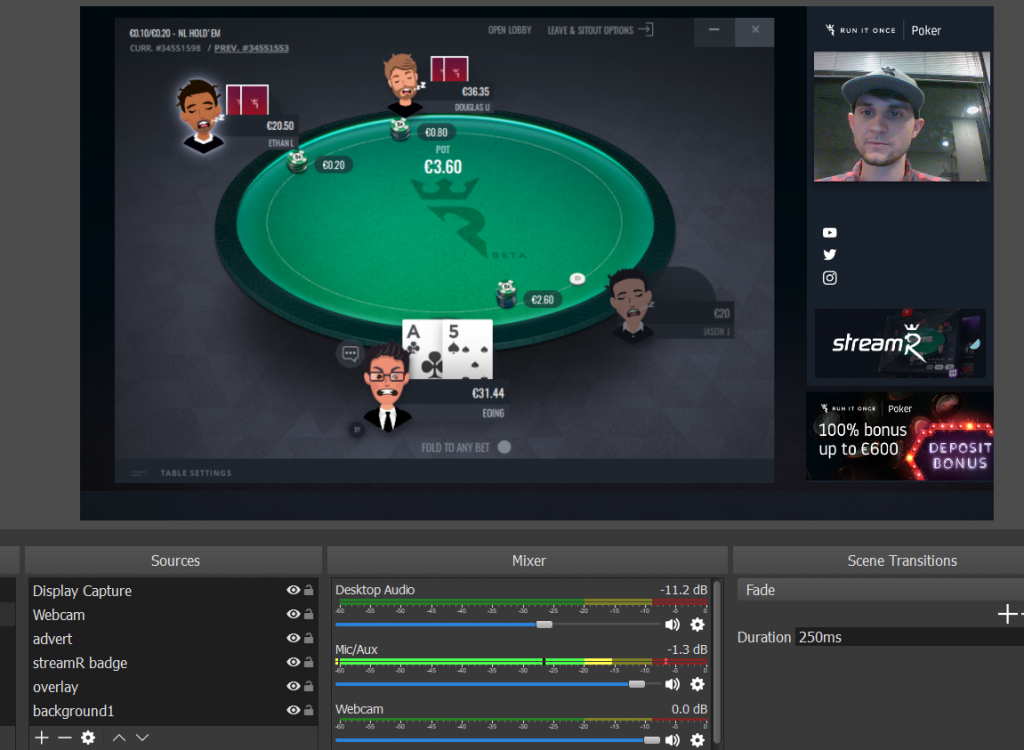
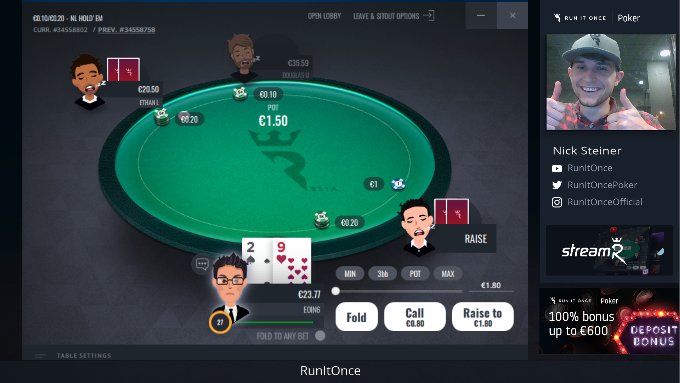
Now your stream should look like this:
It’s time to start streaming! Good luck!
StreamR tutorials:
#1: Setting up your streaming software
#2: Configuring OBS Settings
#3: Creating your stream layout
#4: Adding custom text to your layout