
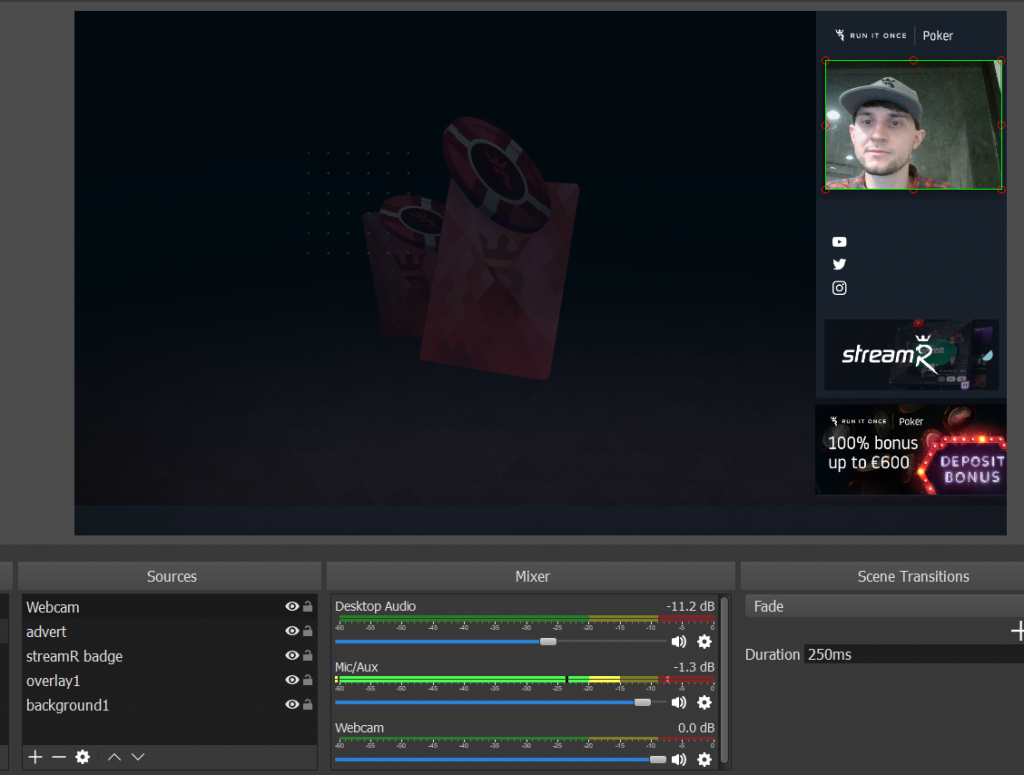
Now that we’ve optimized the settings, it’s time to create the layout of your stream. OBS uses “Scenes” and “Sources” in order to set up the layout of your stream. Sources are where you give OBS an input such as a live view of your screen or your webcam. Scenes are a collection of sources.
By default, there is already a “Scene” created, but all you can see is a black screen. The black scene is a preview of what your stream will look like. In order to add the overlay, poker table, and webcam we must add “Sources.”
Adding Sources: Overlay / Graphics
In this section, we will
Adding a background
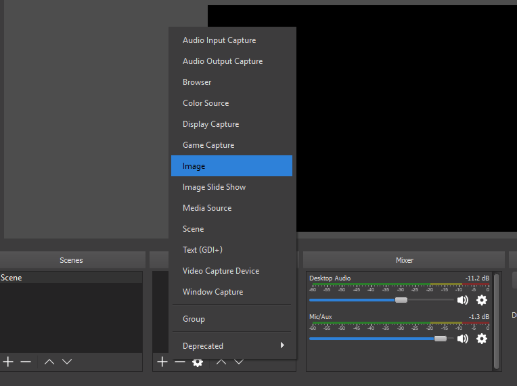
To add a new source, click the “+” icon under “Sources” and then select “Image.”
Download our custom Run It Once themed background here.
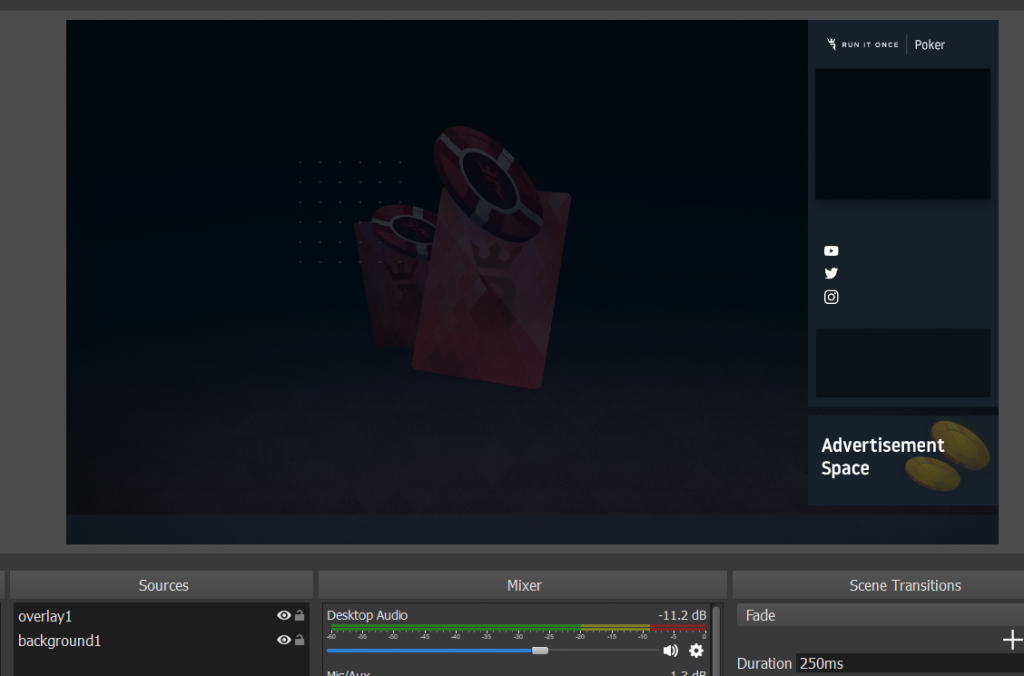
Then find this file and add it. Here is what you’ll see after adding the background.
Adding your overlay
Now, let’s add the overlay to your stream.
Download our custom Run It Once themed overlay here.
Then follow the same steps and select the overlay image. Here is what you should see after adding the overlay.
Adding your streamR badge (required) and ad banner
Now it’s time to add in your
To start,
Download the
Add another image source and select the
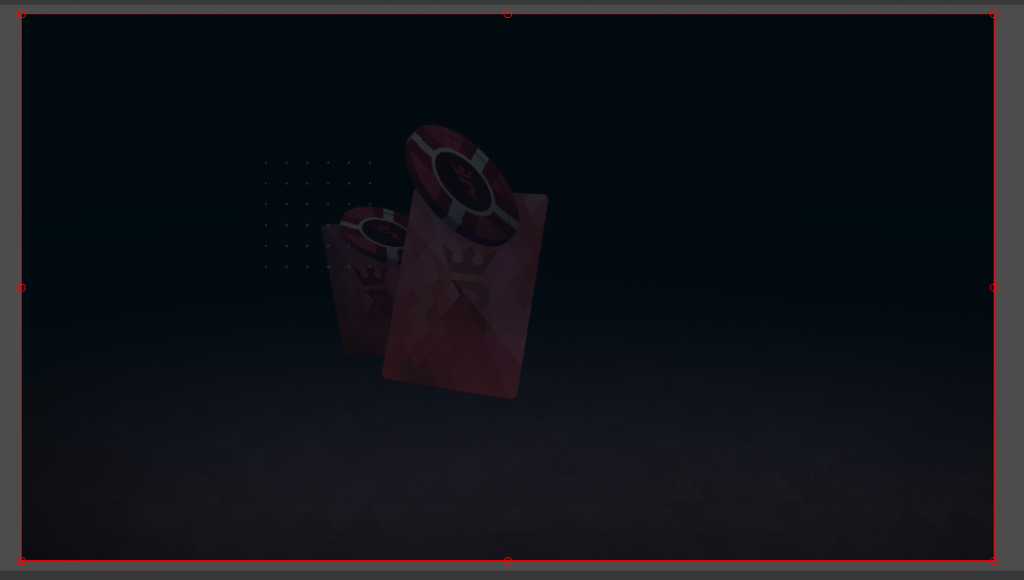
Resizing a Source:
To resize a source, simply click and drag one of the circles on the red box (in any corner).
Here is what it should look like when you’re done.
Advertising banner
There is also a space for another banner – we recommend using the Run It Once banner, but you’re free to add your own custom banner.
Download our Run It Once advertising banner
Add another image source and fit the banner in the designated area in the bottom right corner.
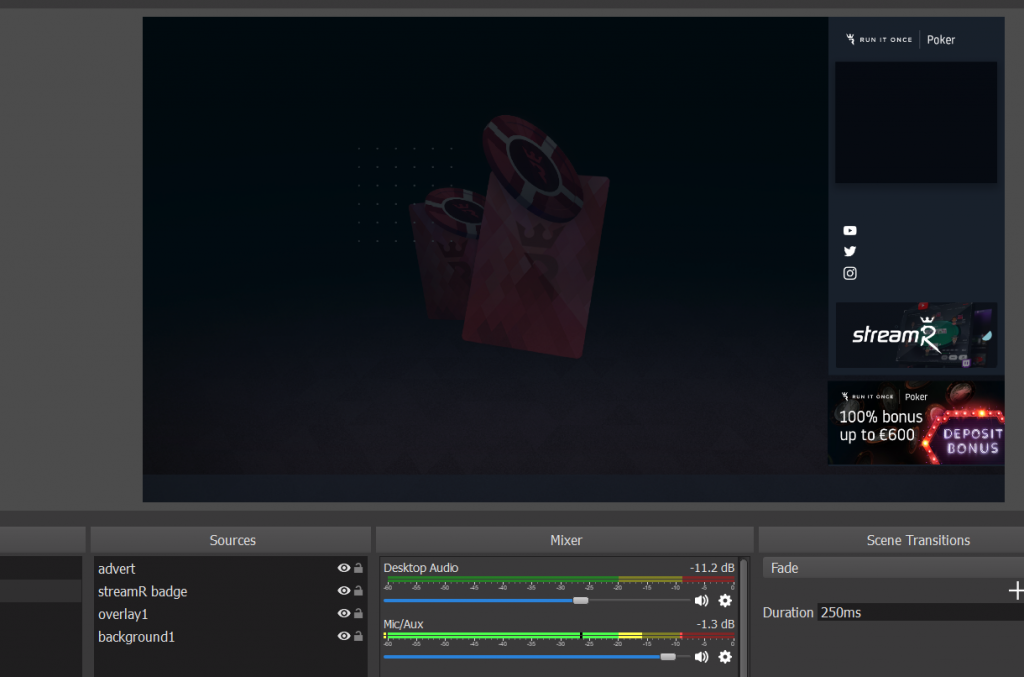
Here is how it should look when you’re done.
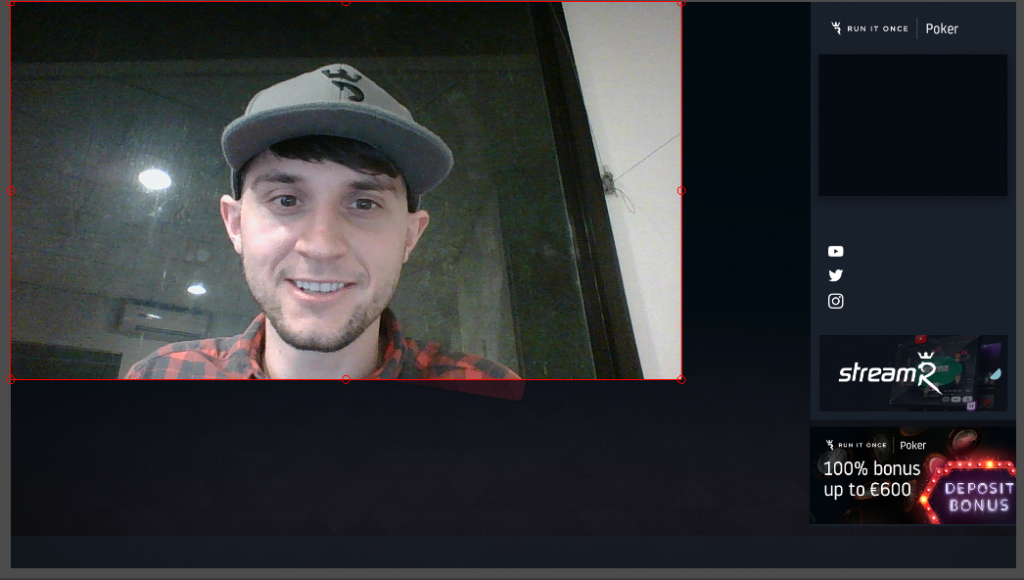
Adding Sources: WebCam
Now, let’s add your webcam to the stream. Add a “Video Capture Device” and make sure the “Make source visible” is clicked, then choose your webcam “Device” and click “ok.”
You will need to resize and crop your webcam to make it fit in the top right corner of the overlay.
Resizing a Source:
To resize a source, simply click and drag one of the circles on the red box (in any corner).
Cropping a Source:
Cropping the webcam will allow you to change
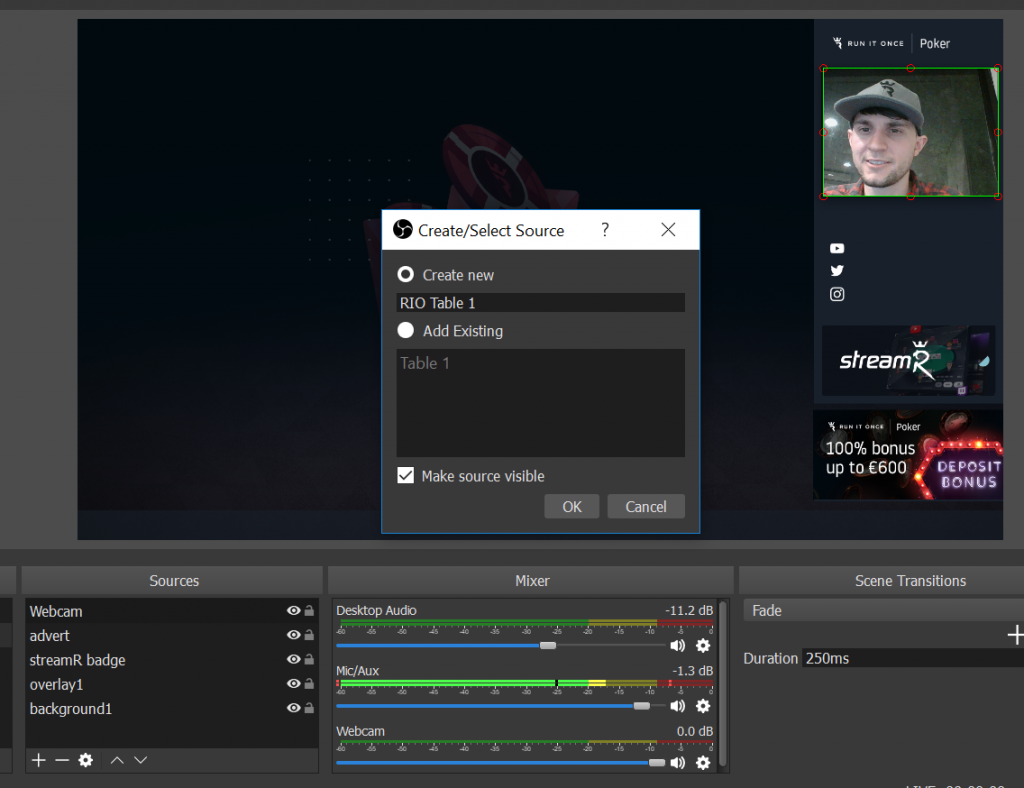
Adding Sources: Poker Table
Next, let’s add a poker table. The source we want to add for this is a display capture. A display capture will record what is displayed on your monitor. To add a new source, click the “+” icon under “Sources” and then select “Display Capture”.

A menu will pop up where you can name your source. This is for our poker table, name it something referencing the table and make sure you leave “Make source visible” checked. Then click “OK”.
The next menu will allow you to select which monitor you want to capture. Use the drop down menu to select your preferred monitor. You also have the option of capturing your mouse cursor, we recommend leaving this enabled so your viewers can follow the action. Once you have your preferred monitor selected, click “OK”.
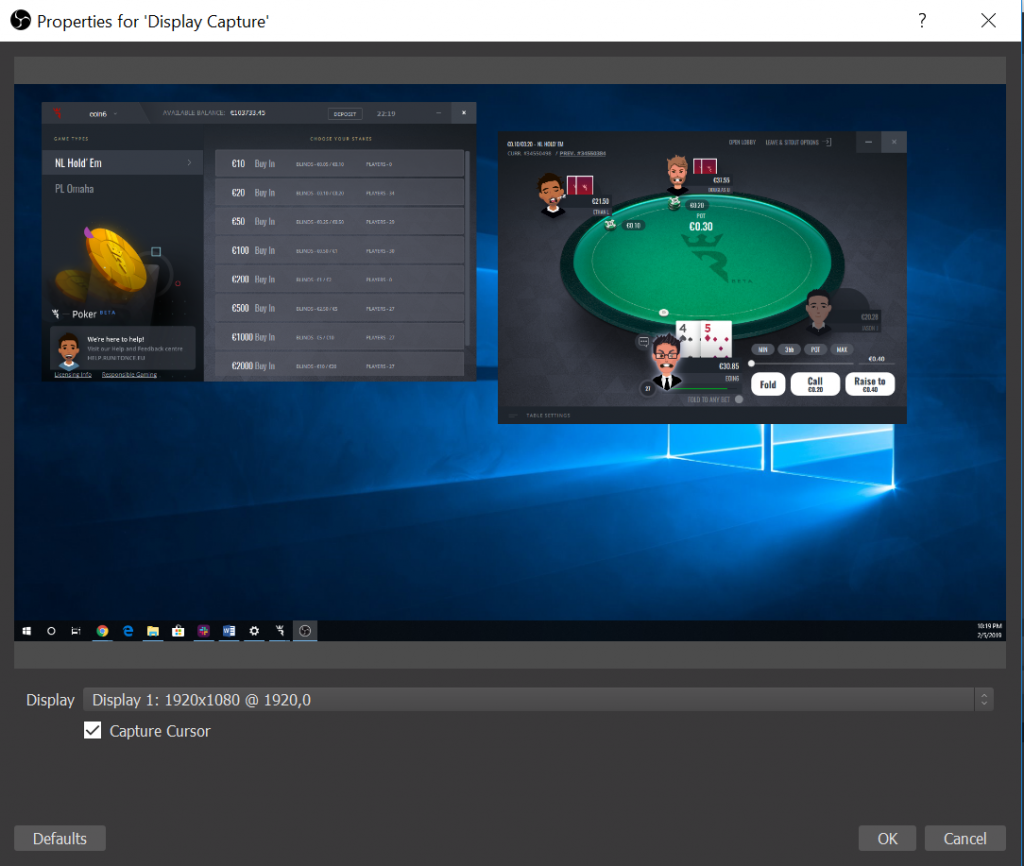
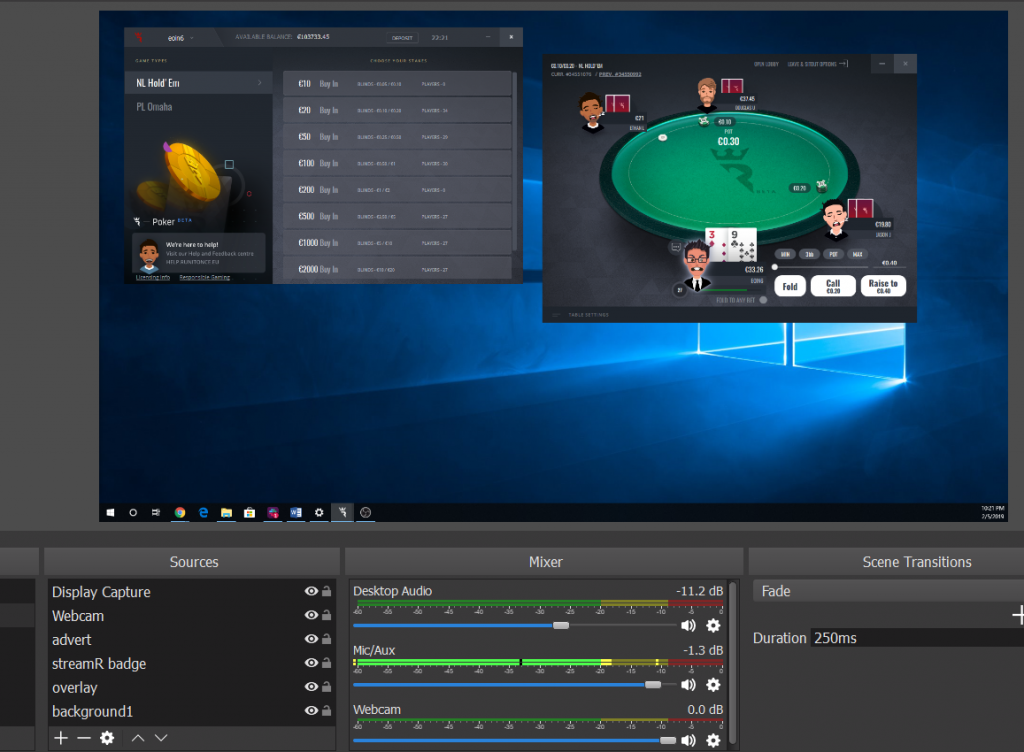
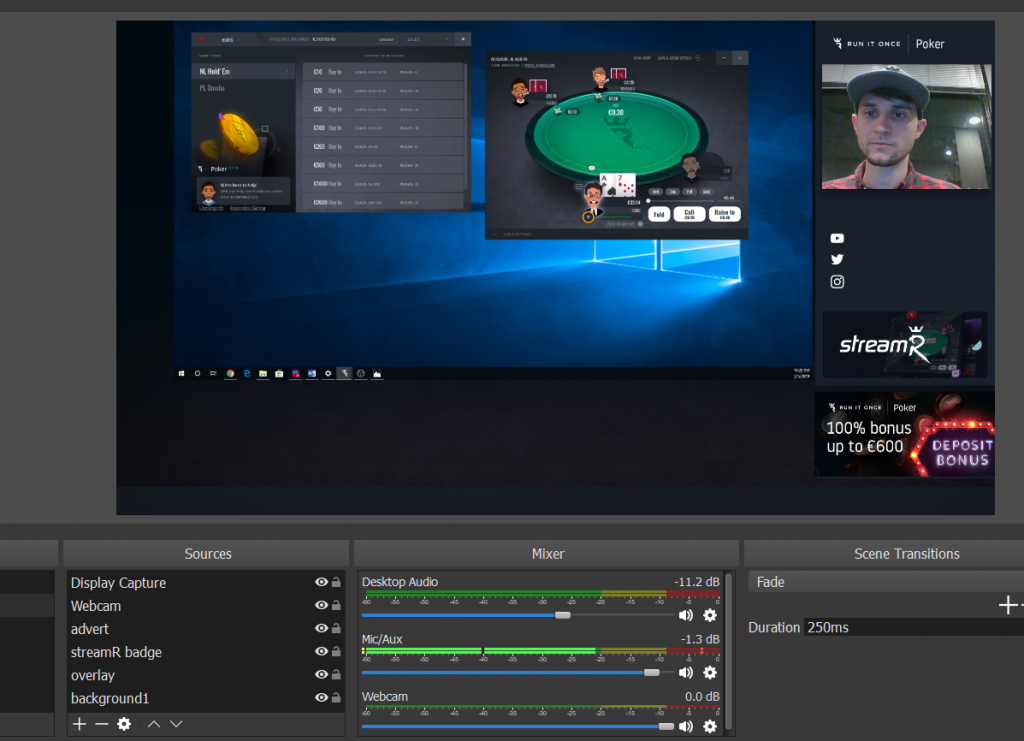
Now that your display capture is set up, you should see your monitor in the preview window of OBS. Our next step is resizing the capture space to focus on just your poker table instead of the entire screen. You should notice a red box around the source.
Resizing a Source:
To resize a source, simply click and drag one of the circles (in any corner) on the red box.
Cropping a Source:
To crop your source, hold down “ALT” on your keyboard while you click and drag one of the red circles on the border around your display. After cropping, the outside box will turn green, which notifies you which sides have been cropped. Once, you cropped the area of your Run It Once Poker table, resize the table to fit properly.
Here is how it should look when you’re finished.
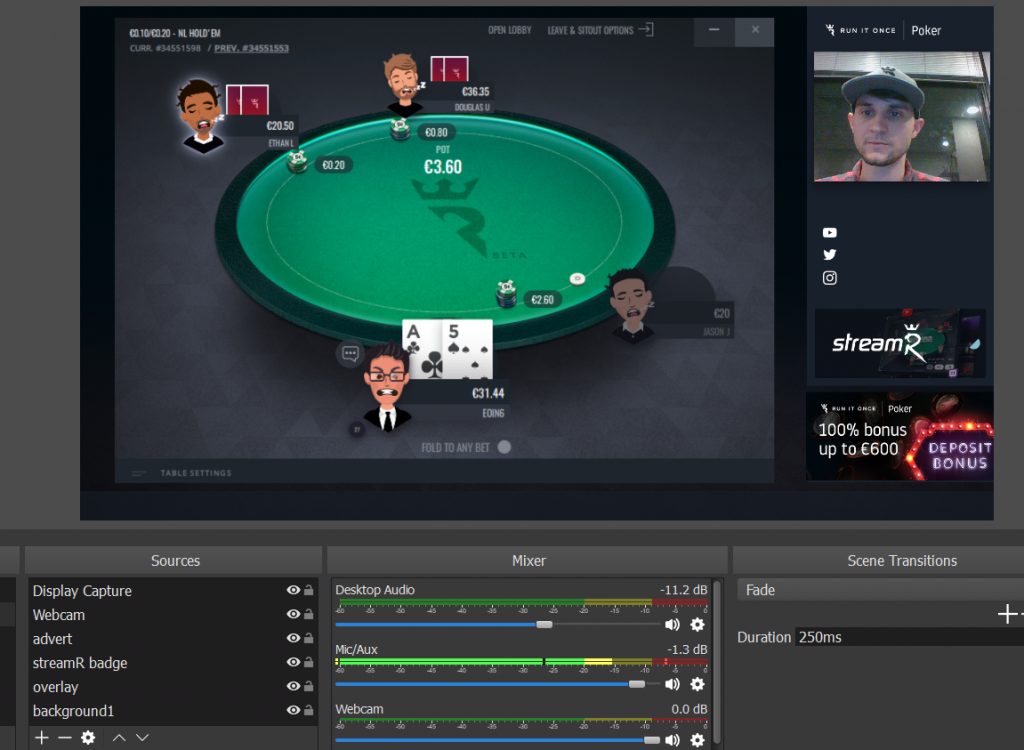
Boom! Now you have the three main elements added to your stream!
StreamR tutorials:
#1: Setting up your streaming software
#2: Configuring OBS Settings
#3: Creating your stream layout
#4: Adding custom text to your layout