
These tutorials will walk your through the steps required to set up your streaming software:
Setting up the streaming software
#1: Download streaming software (OBS)
#2: Connect OBS to Twitch or Youtube
#3: Configuring your OBS settings for an optimal stream
Creating your layout
#4: Add an Overlay & Graphics
#5: Add your WebCam and Poker Table/s
#6: Personalise your Stream
Setting up the streaming software
#1: Download streaming software (OBS)
To stream on Twitch or YouTube, you need to download a streaming software program.
This guide will walk you through setting up a stream using Open Broadcast Software or OBS. OBS is a free streaming and recording software.
Please download OBS Studio using the link below and choose the operating system you’re running for the download to begin.
We recommend using the default settings during the installation process: https://obsproject.com
#2: Connect OBS to Twitch or YouTube
You will need to retrieve a ‘Stream Key’ from the platform you intend to stream from. Follow these instructions, based on the platform/s you will be streaming:
Every user on twitch has a unique “stream key”. A stream key allows users to stream to a specific Twitch account. Do not share your stream key with anyone, because anyone who has your stream key will be able to stream to your Twitch account. Follow these steps:
- Click the following link: https://www.twitch.tv/dashboard/settings – Your Stream Key preferences will be at the top,
- Copy your Stream Key,
- Go to your settings menu in OBS,
- Click on “Stream” in the left sidebar,
- Set “Service” to “Twitch”,
- Paste your stream key in the box next to “Stream key”.

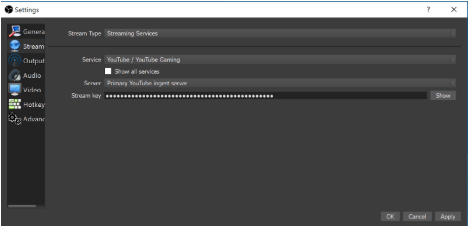
If you’re planning to stream on YouTube, we need to get your YouTube stream key. Follow these steps:
- Click the following link: https://www.youtube.com/live_dashboard?o=U – You will find your “Stream Key” under the “Encoder Setup”,
- Copy your Stream Key,
- Go to your settings menu in OBS,
- Click on “Stream” in the left sidebar.
- Set “Service” to “YouTube / YouTube Gaming”
- Paste your stream key in the box next to “Stream key”.
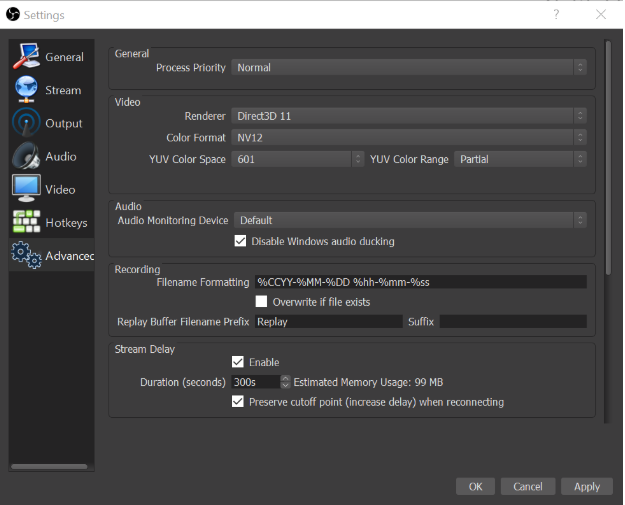
#3: Configuring OBS for optimal streaming
Now lets optimise your OBS settings. To optimise your OBS settings, open OBS and and navigate to your “Settings” which can be found in the bottom right corner.
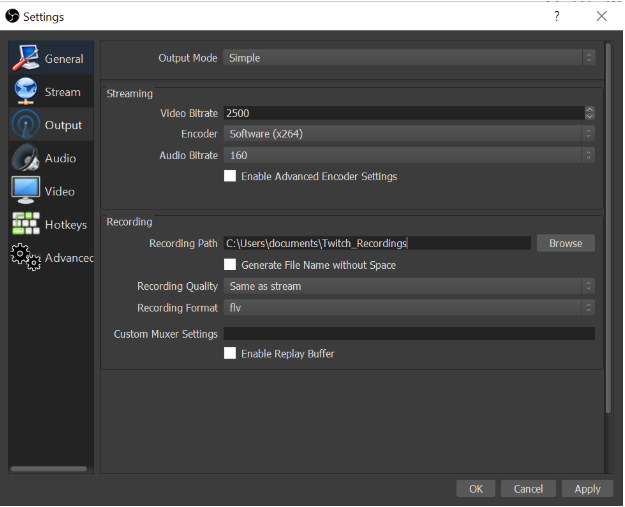
| Setting Name | Value |
| Video Bitrate | Start at 2500 – lower if lag is experienced. |
| Recording | Select where you’d like to save your recordings |
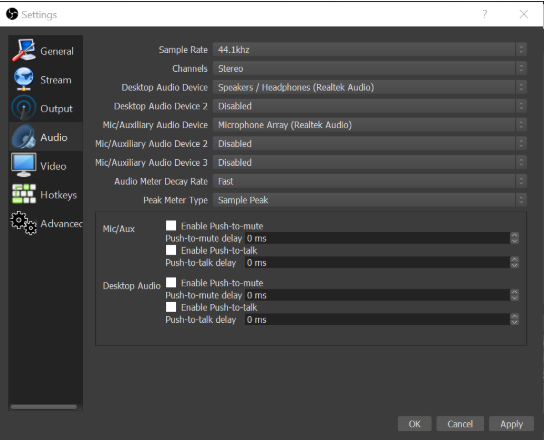
| Setting Name | Value |
| Desktop Audio Device | Select where you would like to hear your audio – your viewers will hear the same as you. |
| Mic/Auxiliary Audio Device | Select your microphone from the dropdown. |
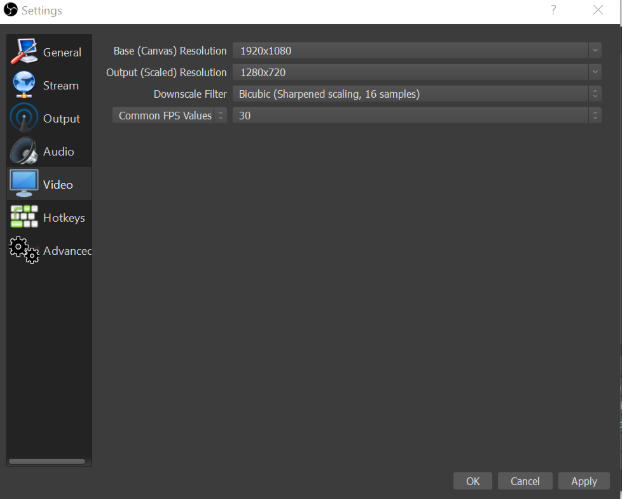
| Setting Name | Value |
| Base (Canvas) Resolution | Set this to your monitor’s current screen resolution |
| Output (Scaled) Resolution | 1280×720 |
| Setting Name | Value |
| Stream Delay | Enabled |
| Delay Duration | 4 or 5 minute (240-300 seconds) |
Creating Your Layout
Introduction to Scenes and Sources
OBS uses “Scenes” and “Sources” in order to set up the layout of your stream. Sources are where you give OBS an input such as a live view of your screen or your webcam. Scenes are a collection of sources.
By default, there is already a “Scene” created, but all you can see is a black screen. The black scene is a preview of what your stream will look like.
#4: Add an Overlay & Graphics
In this section, we will be adding multiple images including: a background, a overlay, your streamR badge, and an advertising banner.
Download our custom Run It Once themed background
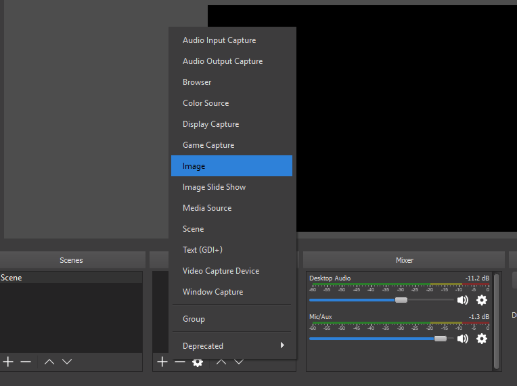
To add a background image, click the “+” icon under “Sources” and then select “Image”. Then locate the background image that you downloaded.
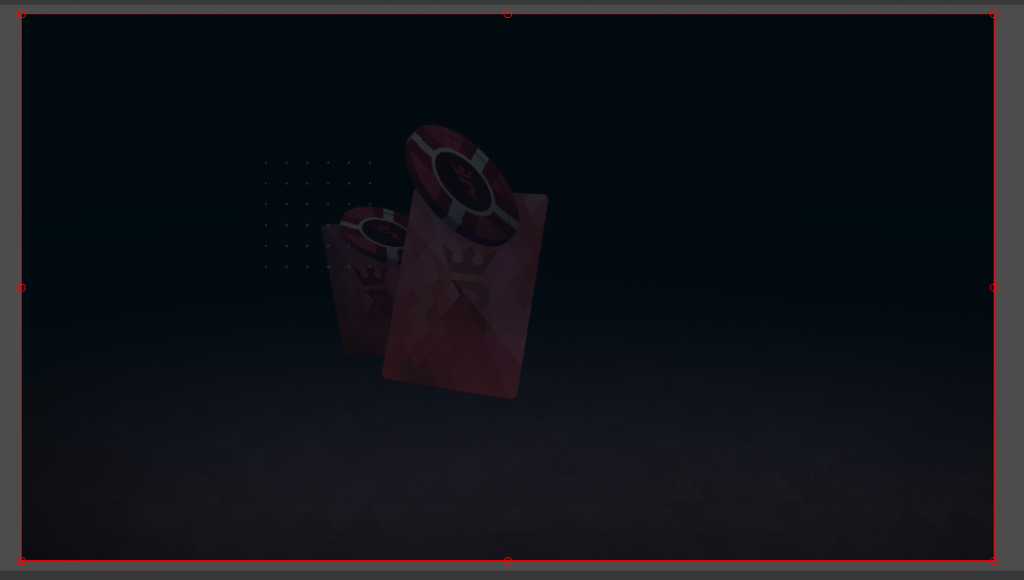
Here is what you’ll see after adding the background.
Download our custom Run It Once themed overlay
To add an overlay, click the “+” icon under “Sources” and then select “Image”. Then locate the overlay image that you downloaded.
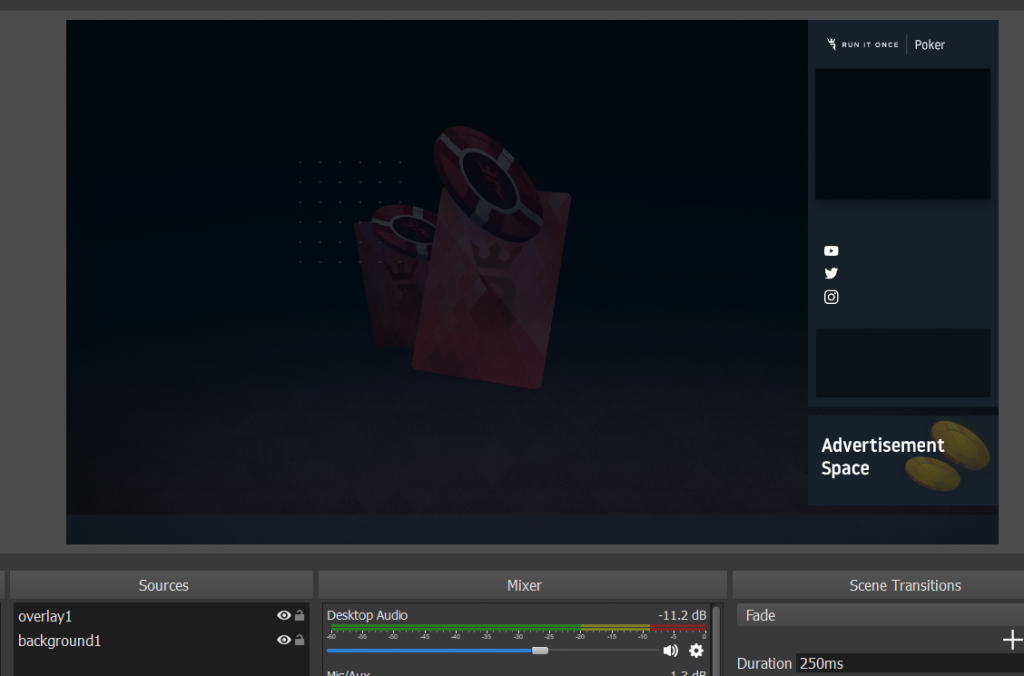
Here is what you should see after adding the overlay.
When you become a streamR, we give you a starter banner, but each time you move up the streamR level ranks we will provide a level specific banner.
Download your streamR starter badge
To add your streamR badge, click the “+” icon under “Sources” and then select “Image”. Then locate the streamR badge image that you downloaded. You will need to resize and move the image to fit in the designated area.
Resizing your badge:
To resize a source, simply click and drag one of the circles on the red box (in any corner).
Here is what it should look like when you’re done.
#5: Add your WebCam and Poker Table/s
In this section, we will add your webcam and tables.
To add your webcam, click the “+” icon under “Sources” and then select “Video Capture Device” and make sure the “Make source visible” is clicked, then choose your webcam “Device” and click “ok”.
You will need to resize and move the image to fit in the designated area.
Resizing your webcam:
To resize your webcam, simply click and drag one of the circles on the red box (in any corner).
Cropping your webcam:
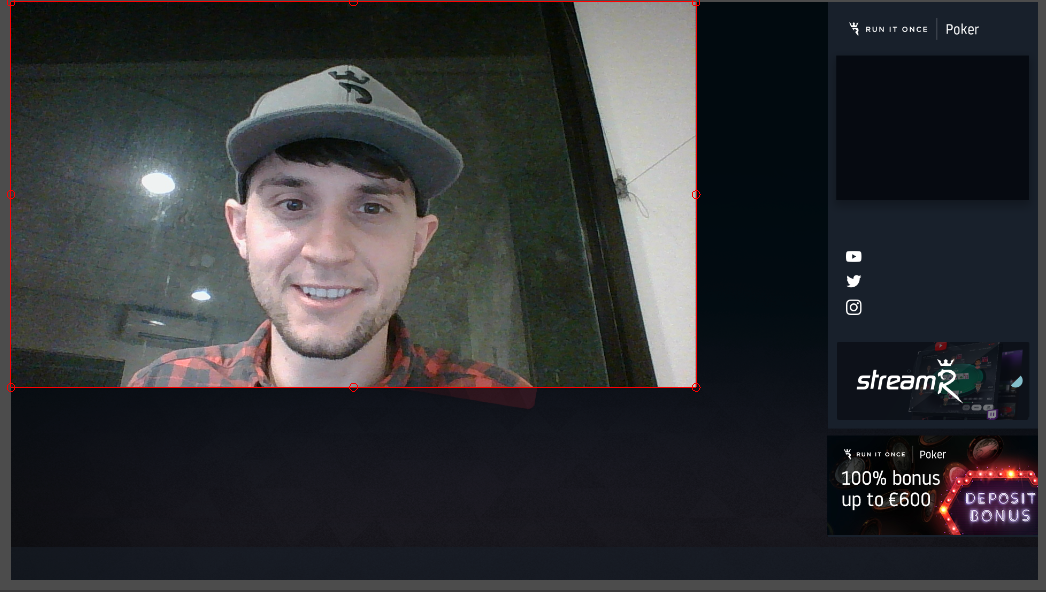
Cropping the webcam will allow you to change shape of the webcam box which will allow it to fit in the designated area. To crop your source, hold down “ALT” on your keyboard while you click and drag one of the red circles on the border around your display. After cropping, the outside box will turn green, which notifies you which sides have been cropped.
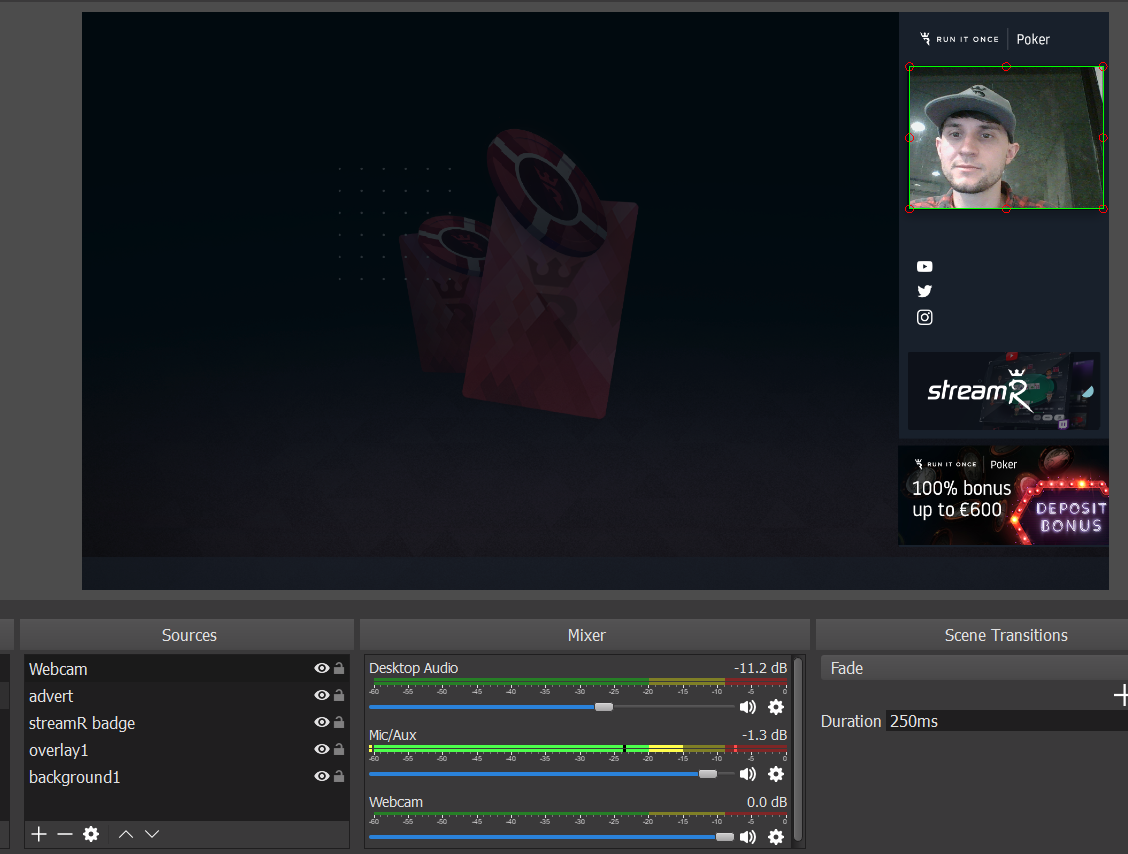
Here is how it should look when you’re done.
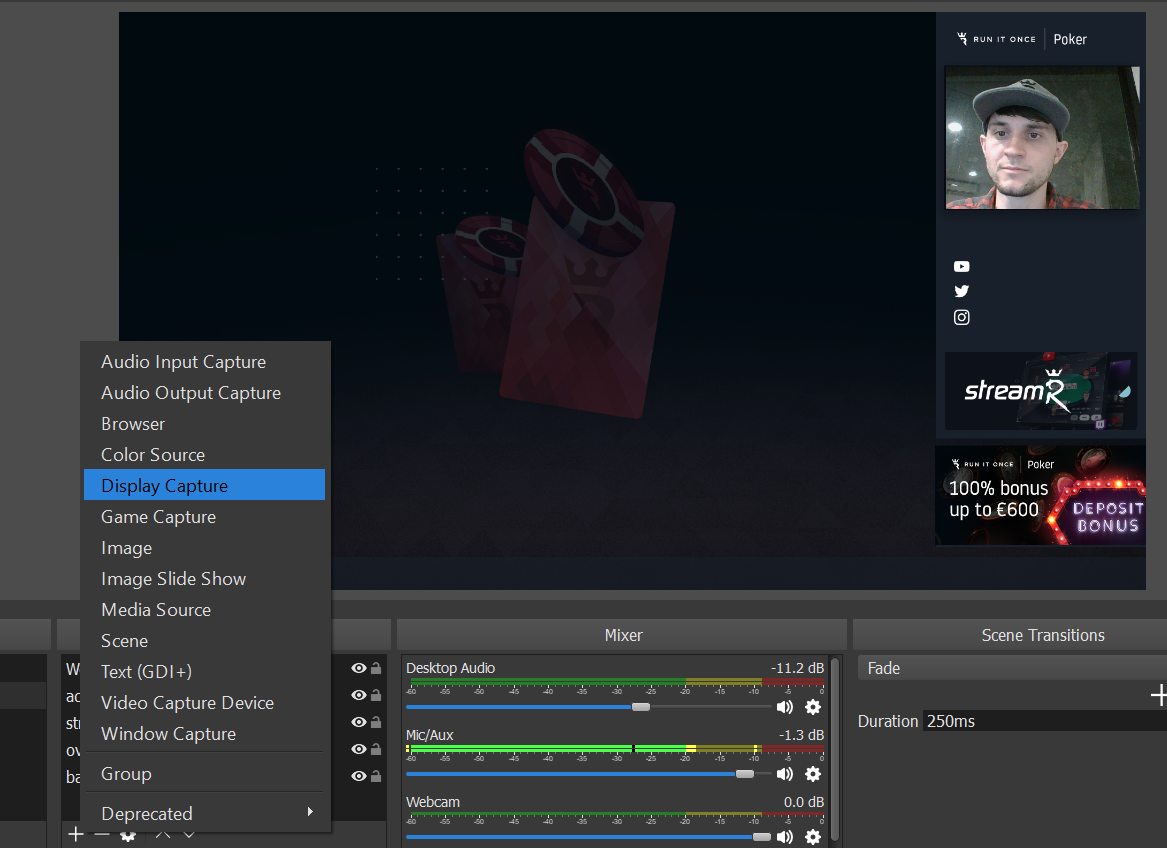
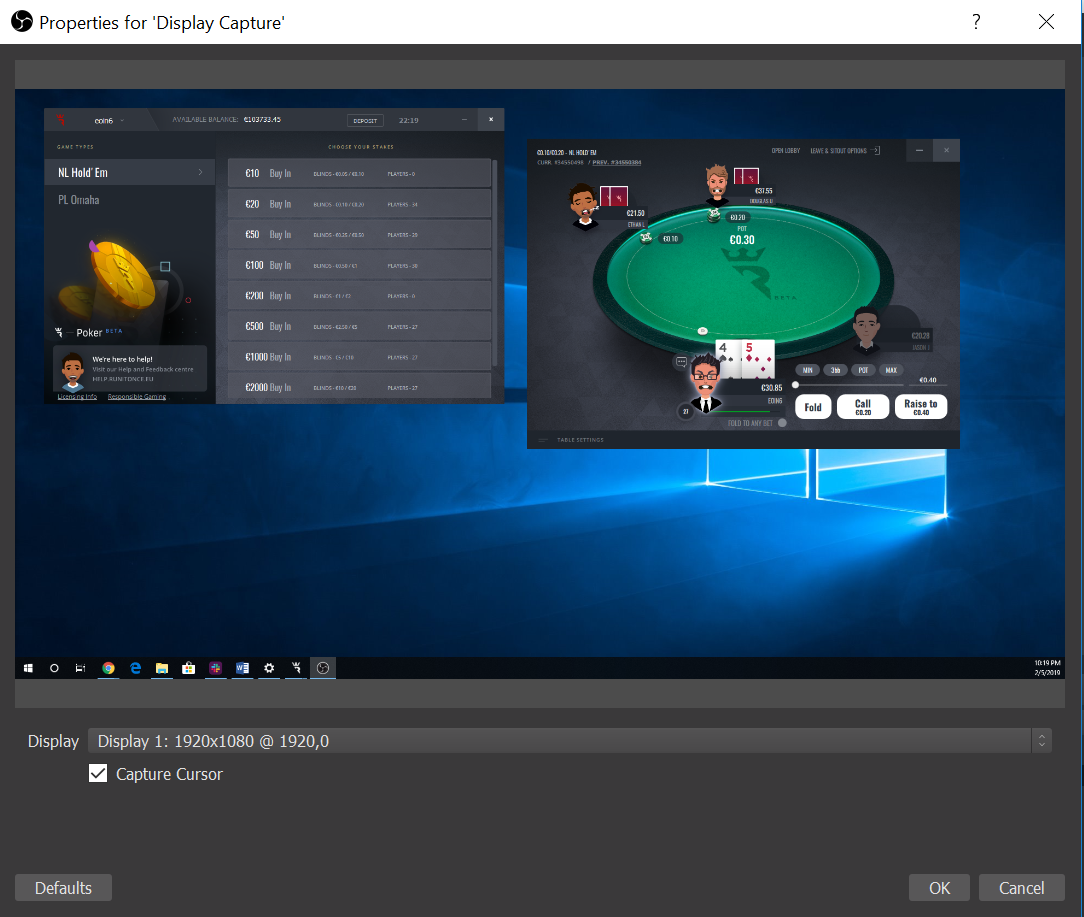
To add a table, click the “+” icon under “Sources” and then select “Display Capture”. A display capture will record what is displayed on your monitor.
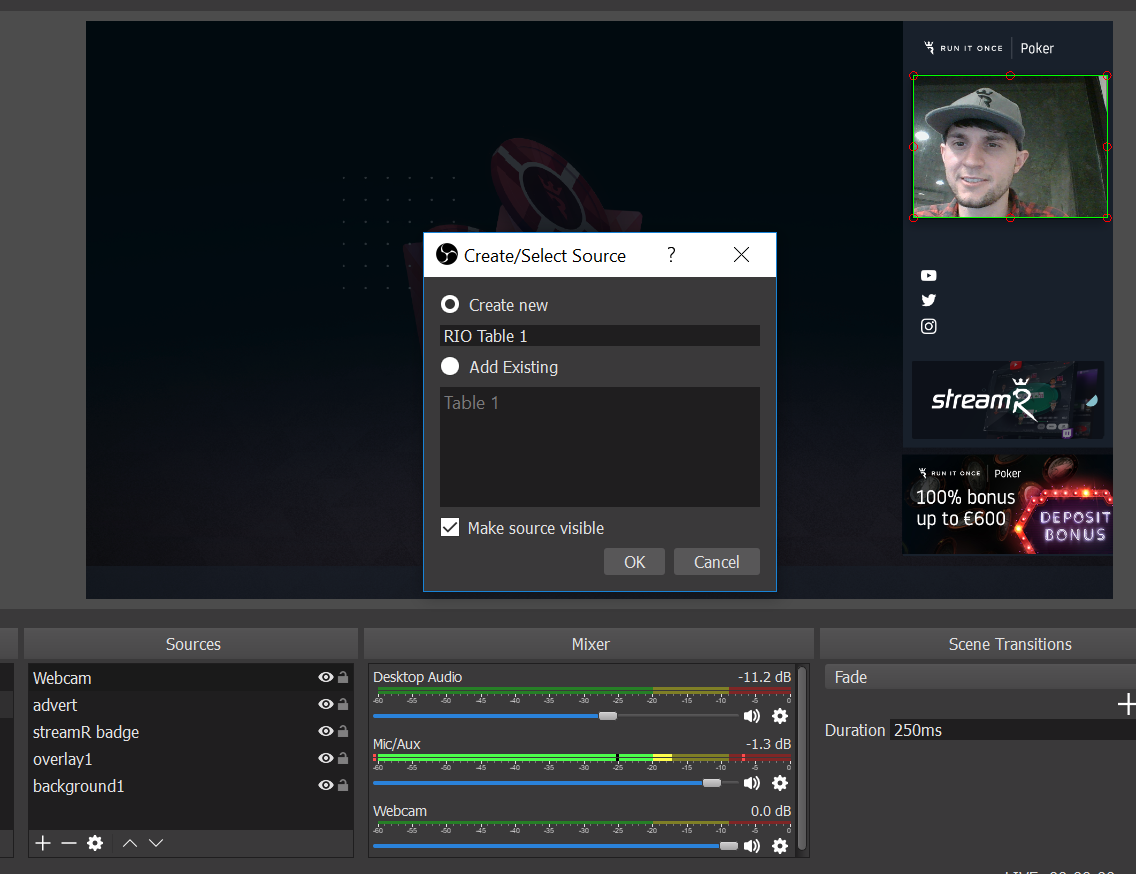
A menu will pop up where you can name your source. This is for our poker table, name it something referencing the table and make sure you leave “Make source visible” checked. Then click “OK”.
The next menu will allow you to select which monitor you want to capture. Use the drop down menu to select your preferred monitor. You also have the option of capturing your mouse cursor, we recommend leaving this enabled so your viewers can follow the action. Once you have your preferred monitor selected, click “OK”.
Now that your display capture is set up, you should see your monitor in the preview window of OBS. Our next step is resizing the capture space to focus on just your poker table instead of the entire screen. You should notice a red box around the source.

Resizing a table:
To resize a source, simply click and drag one of the circles (in any corner) on the red box.
Cropping your table/s:
To crop your source, hold down “ALT” on your keyboard while you click and drag one of the red circles on the border around your display. After cropping, the outside box will turn green, which notifies you which sides have been cropped. Once, you cropped the area of your Run It Once Poker table, resize the table to fit properly.
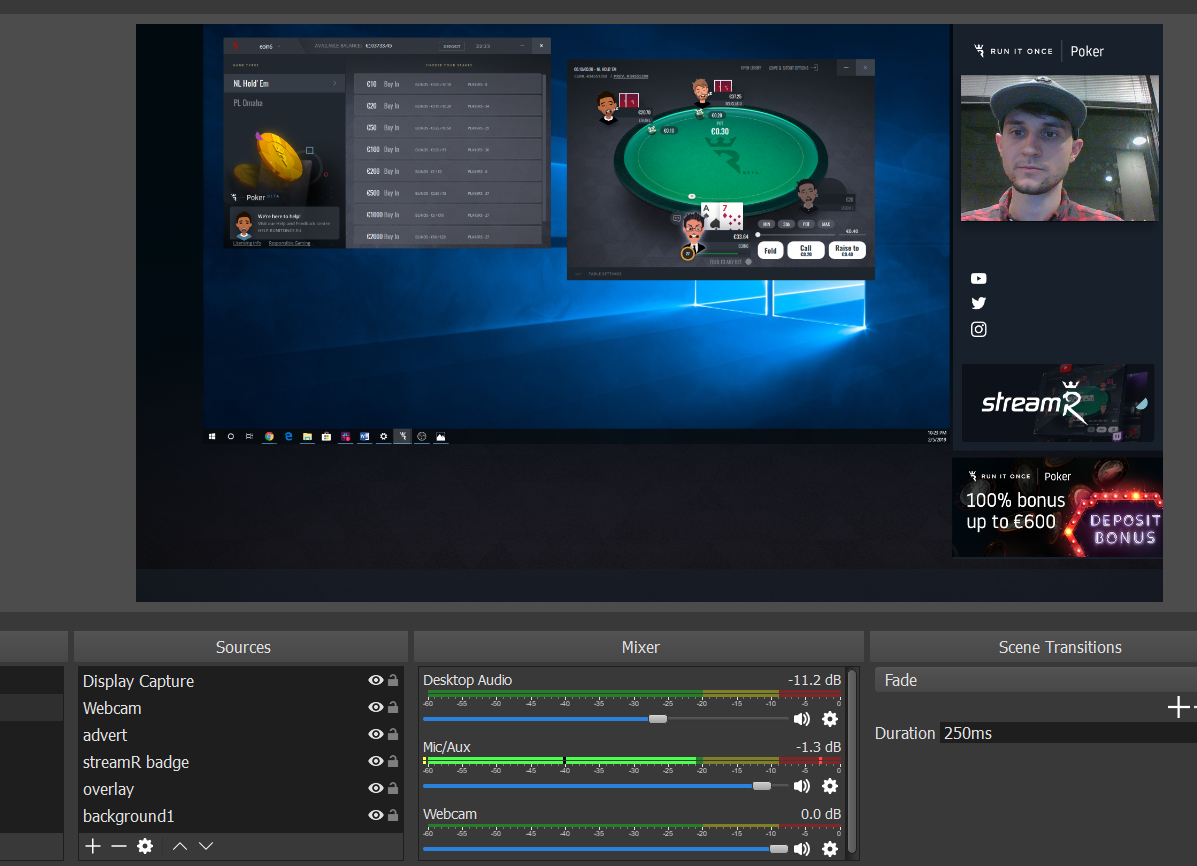
Here is how it should look when you’re finished.

#6: Personalise your Stream
In this section, we will be adding your usernames on the screen, as well as adding your social handles.
As you can see, there are empty boxes on the right-hand side to add your social handles.
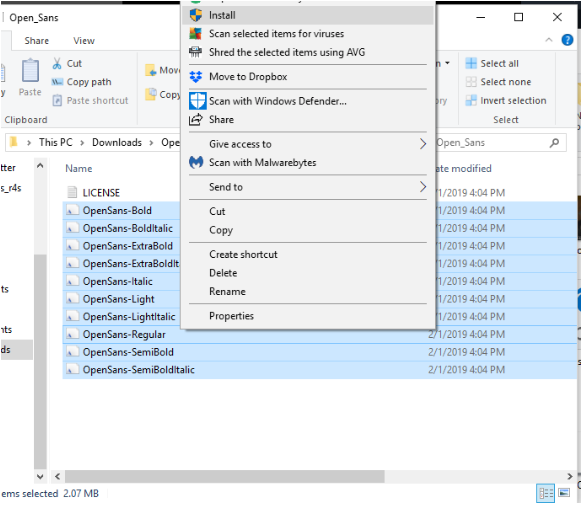
Installing the font
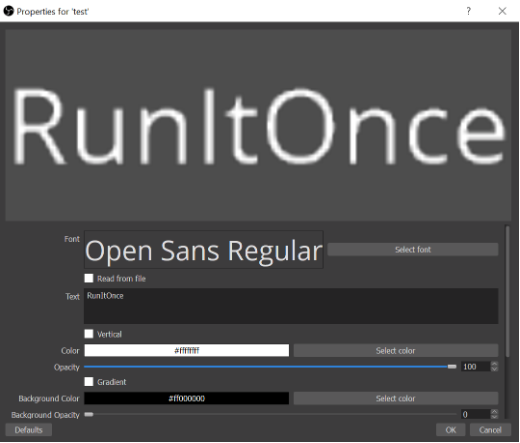
The font we use is “Open Sans.” Unfortunately, this isn’t a featured font in OBS. Click here to download the font, open and extract the Open_Sans file. Then highlight all the files, except “LICENSE,” right click and select “Install.”
You will need to restart OBS in order to use the newly downloaded font. After, relaunching OBS add a new “Text (GDI+)” scene.
Select font and find “Open Sans” and select “36” as the font size. Now in the “Text” section type your Twitch username.
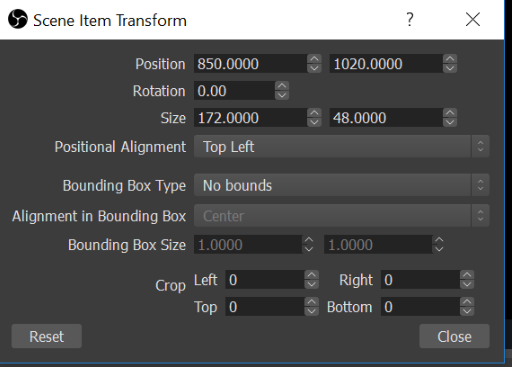
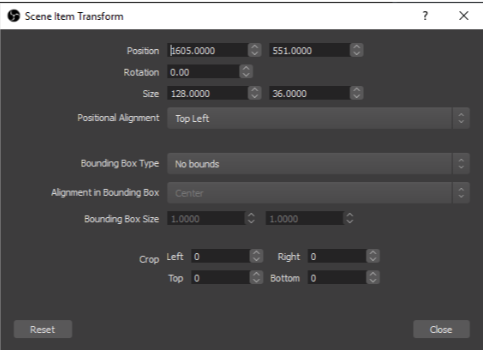
After adding this, right click and select “Transform” and “Edit Transform”
To center your Twitch Username at the bottom of your stream, insert the following numbers for “Position”.
Select font and find “Open Sans” and select “36” as the font size. Now in the “Text” section type your name.
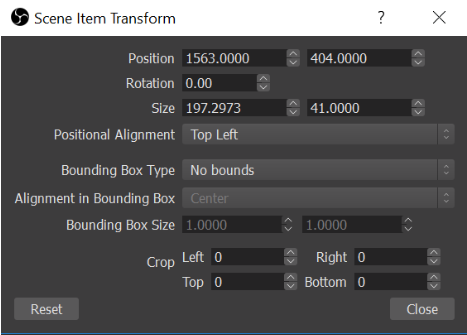
After adding this, right click and select “Transform” and “Edit Transform”
To position your name in the right-hand panel of your stream, insert the following numbers for “Position”.
Select font and find “Open Sans” and select “36” as the font size. Now in the “Text” section type your YouTube channel.
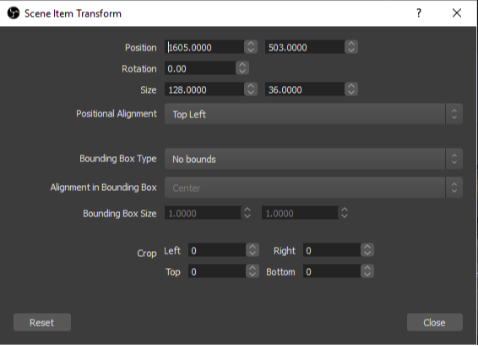
After adding this, right click and select “Transform” and “Edit Transform”
To position your YouTube channel in the right-hand panel of your stream, insert the following numbers for “Position”.

Select font and find “Open Sans” and select “36” as the font size. Now in the “Text” section type your Twitter username.
After adding this, right click and select “Transform” and “Edit Transform”
To position your Twitter username in the right-hand panel of your stream, insert the following numbers for “Position”.
Select font and find “Open Sans” and select “36” as the font size. Now in the “Text” section type your Instagram username.
After adding this, right click and select “Transform” and “Edit Transform”
To position your Instagram username in the right-hand panel of your stream, insert the following numbers for “Position”.
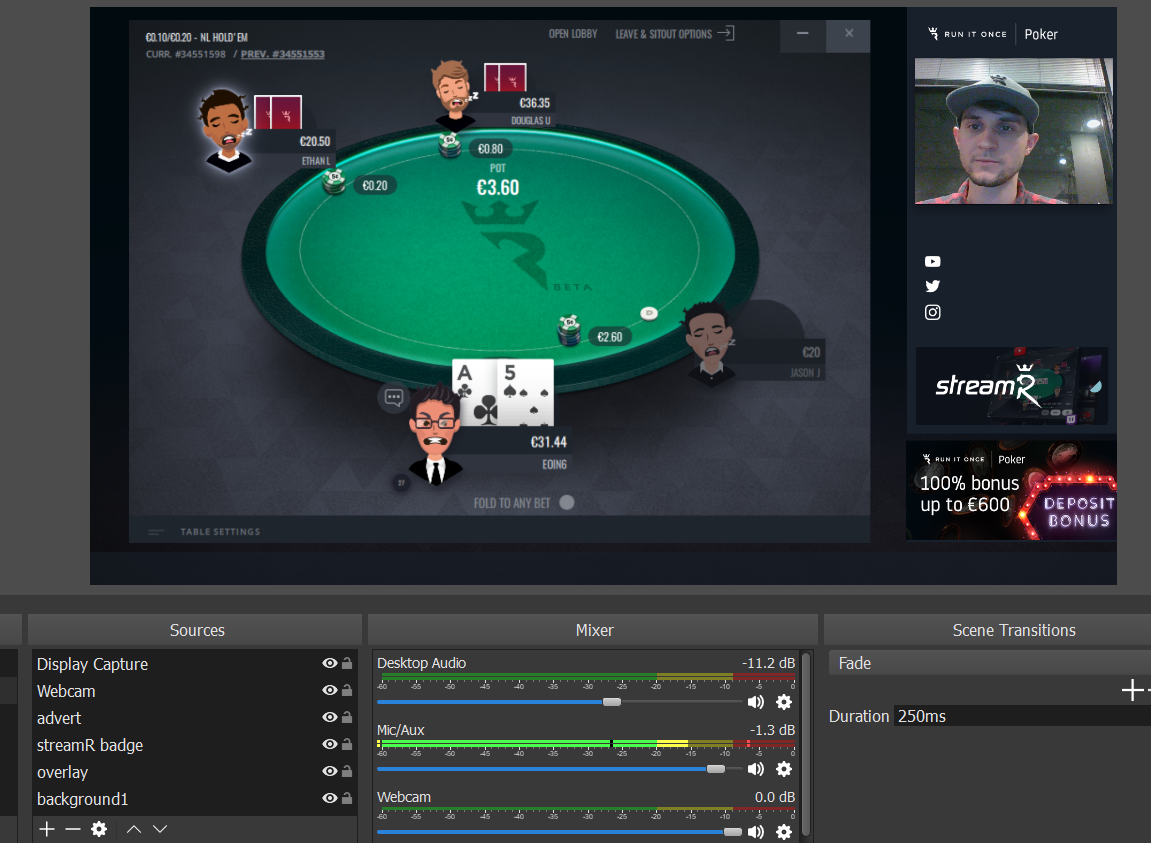
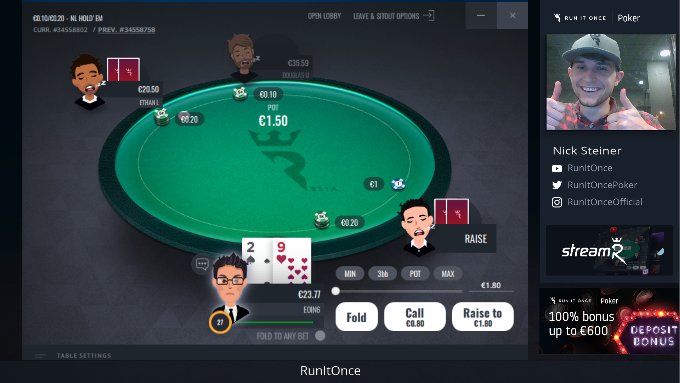
Ready to Stream!
Now your stream should look like this:
streamR Help Articles
- Overview
- Quickstart Setup
- Manual Setup Tutorials (you are here)
- Requirements
- Reporting Your Hours
- Join our streamR Discord