
The settings area in the app offers a range of settings that you can change. To view the Settings area of the app:
- Launch the app and log in to your account;
- From the lobby, click the ‘Settings’ icon in the left-hand navigation panel.
The main sections in the “Settings” area are:
Table Appearance
In the ‘Table Appearance’ section, you can change the appearance of the table/s you play. You can change the following:
- Card-fronts style;
- Table background style;
- HeroIQ theme and options – Learn more about HeroIQ;
- Option to optimise for higher performance.
Game Play
In the ‘Gameplay’ section, you can change:
- HotKeys;
- Show / muck hands;
- Bet Slider options;
- Auto-set bet amounts;
- Display Big Blinds;
- Multi-tabling options.
Hotkeys
Our Hotkeys feature allows you to set specific keys to make poker actions for you on the tables.
Follow these steps to activate and manage your Hotkeys:
- Launch the app and log in to your account;
- From the lobby, click the ‘Settings’ icon in the left-hand navigation panel;
- Go to ‘Game Play’ section from the left-hand menu;
- Expand the HotKeys section by clicking on the HotKeys section.
The first thing you should do is click on ‘Enable Hotkeys’. This will turn on the hotkeys function. You can then start adding your Hotkeys to the list by doing the following:
- Choose an ‘Action’: This is a list of Actions you can choose to pair with your keyboard shortcut.
- Click into the Assign a ‘Hotkey’ box: Here is where you assign a key to the chosen action.
- If necessary, add the extra information required from hotkey choices in the box that appears. For example the % of pot value you choose for “Set Bet amount to X of pot”
- Click ‘Add a hotkey’: This will finalise your Action/Hotkey pairing selection.
- Repeat and continue the above steps until you have added all your desired hotkeys
- Scroll down and click on ‘Save’ under the “Target Tables for Hotkeys” options, so that the hotkeys are saved.
- Your hotkeys are now ready to use.
If you do not want to use any of the HotKeys you have set up any more, follow these steps to delete the hotkey:
- Hover over the hotkey you wish to delete in the list of active hotkeys.
- Click the bin icon to the right side of the hotkey.
- Scroll down and click on ‘Save’ under the “Target Tables for Hotkeys” options, so that the hotkeys are saved.
Once you have set up a hotkey for a particular action, you cannot edit it. If you select an ‘Action’ which already has a hotkey assigned and pair it with a different hotkey, both hotkeys will perform the same action.
If you would like to change a particular hotkey, simply remove it and set up a new one from scratch.
Do not forget to save your settings after you are done.
There is an option to choose how your hotkeys work. This is the ‘Send Hotkeys To’ section in the “Target Tables for Hotkeys” section.
‘Active Window’: This is the default selection. Your hotkeys will work on the table that is active or which you have clicked on to make active.
‘Table Under Mouse’: This option allows you to simply use your mouse to choose which table you want to be active. You just point your mouse to that table and it becomes active for hotkey use.
You can also choose to ‘Highlight Target Table’ in a particular colour. This will make the frame of the target table window light up in the colour you have chosen.
Show / Muck Hands
When a player gets to showdown, and their opponent shows a winning hand, they can choose to “Muck” their hand, folding it so they do not show the opponent the hand that lost.
From this settings menu, you can choose to have the software always automatically muck:
- Losing hands;
- and/or Winning hands.
Bet Slider Options
Our Bet Slider allows you to set up and execute any betting action at any Run It Once Poker table.
Follow these steps to locate the customisation feature for both pre-selected adjustments and betting shortcuts:
- Launch the app and log in to your account;
- From the lobby, click the ‘Settings’ icon in the left-hand navigation panel;
- Go to ‘Game Play’ section from the left-hand menu;
- Expand the Bet Slider section by clicking on the Bet Slider section.
Select this option if you would like the slider toggle to jump to any position on the slider that is clicked.
Select this option if you would like to invert the motion of the toggle, when the mouse wheel is moved (whilst hovering over the slider itself).
Under ‘Bet Size Adjustments’, we offer incremental bet size adjustments by the Small Blind or Big Blind amounts.
Our Bet Slider offers four shortcut buttons for both pre-flop and post-flop decisions. They allow you to quickly make a bet of a predefined amount.
For each pre-flop button you can select any of these actions:
- ‘Disabled’
- ‘Min’ representing a minimum bet or raise
- ‘Big Blind’ where you will be able to choose a certain predefined Big Blind amount ranging from 2 to 6
- ‘Pot’ for a pot size bet or raise
- ‘Max’ for a maximum possible bet.
As for post-flop buttons, you will be able to select any of these actions:
- ‘Disabled’
- ‘Min’ representing a minimum bet or raise
- ‘½ Pot’
- ‘2⁄3 Pot’
- ‘¾ Pot’
- ‘% of Pot’
- ‘Pot’ for a pot size bet or raise
- ‘Max’
Auto-Set Bet Amounts
Choose to set the initial / default bet amount when it’s your turn, in each stage of a hand:
- Pre-flop;
- Flop;
- Turn;
- River.
You can select different bet amounts for NLHE and PLO games.
Display Big Blinds
Choose to view stacks and bets in:
- Big Blinds, or;
- Euro.
You can also choose to enable an option to toggle the options when clicking on the hero’s seat.
Multi-Tabling Options
Choose how tables behave when you have more than one table open:
- Popup table when action is required
Choose to have your table windows pop up to the front of your screen whenever action is required from you; - Don’t steal focus
Choose to disable tables stealing focus when action is required.
Table Arrangement Options
Choose your default table arrangement:
- Remember Table Layout
Choose to have your current table layout (your tables must be open and in position when selecting this option); - Stack Tables
Choose to have your tables directly on top of each other, with no overlap;
- Tile Tables
Choose to have your tables arrange in a grid on your primary monitor; - Cascade Tables
Choose to have your tables arrange in a stack with a small offset between each table, so that all tables are at least partially visible;
- Custom Layouts
There are 6 custom layout slots that can be managed here. When you have multiple tables open in a layout you like, click ‘Save new’ (or ‘Update’, if the custom slot already has a layout saved) to save the layout.
Please note:
Table Layout options are accessible within the table windows, via the Table Layout menu (top right-hand side of the table windows). There you will also find some useful alignment options, which should help you manage your table layout/s.
Currently on Run It Once Poker, tables will only tile to your primary monitor. This will be addressed in future software versions, but for now if you wish to tile on a second display, you can do so by changing your primary monitor using the following instructions:
Windows
Step 1: Navigate to “Display Settings” using Windows Search;
Step 2: Select your desired secondary display by clicking the relevant display box:
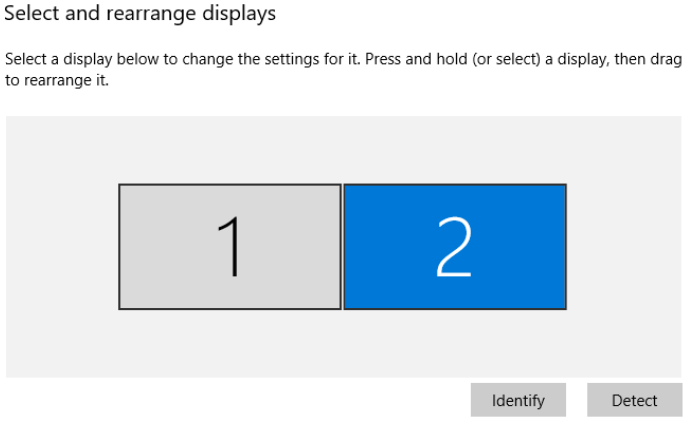
Step 3: Scroll Down to the “Multiple displays” section and check the box marked “Make this my main display”.
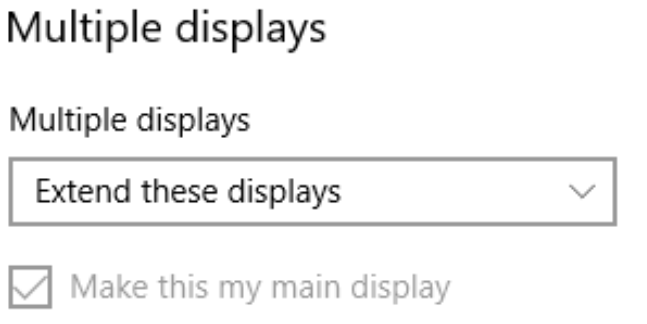
Note: On windows, tiling behaviour will only update after restarting the app.
Mac
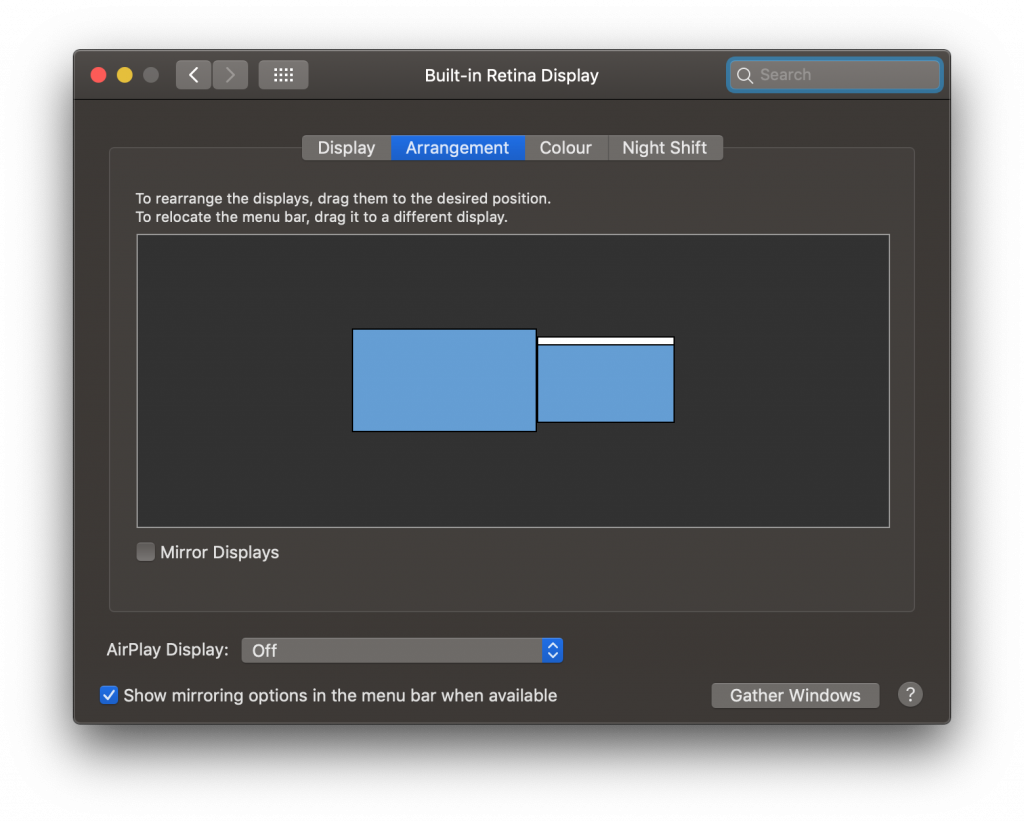
Step 1: Using search, navigate to “Displays” within “System Preferences”;
Step 2: Click on the “Arrangement” tab;
Step 3: Drag the white “menu bar” on the display visualisation to yout desired secondary display.
You should now instantly be able to tile tables to the newly selected display.
Buy-in / Rebuy
There is the option to automatically top-up/rebuy your stack to 100 Big Blinds if:
- You are out of chips;
- You fall under a certain amount of Big Blinds.
Please note:
You can choose to toggle the automatic rebuys setting on individual tables, via the Table Settings menu in the bottom left-hand corner of the tables.
Sounds
Choose to disable or enable:
- General game sounds;
- Game alerts (sounds that alert you when it’s your turn).